


Experimenting with HDR Photography
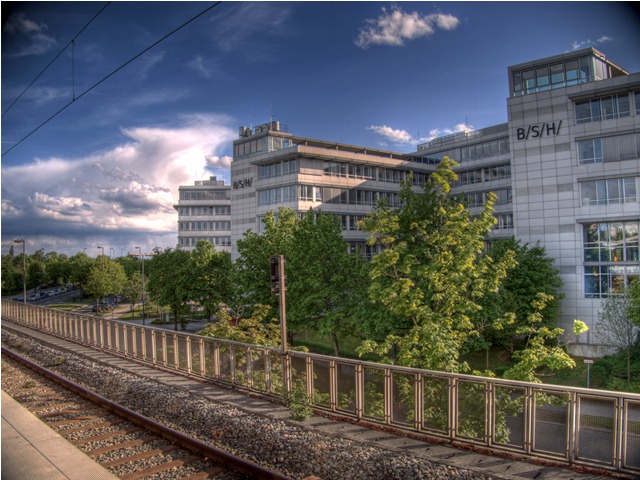
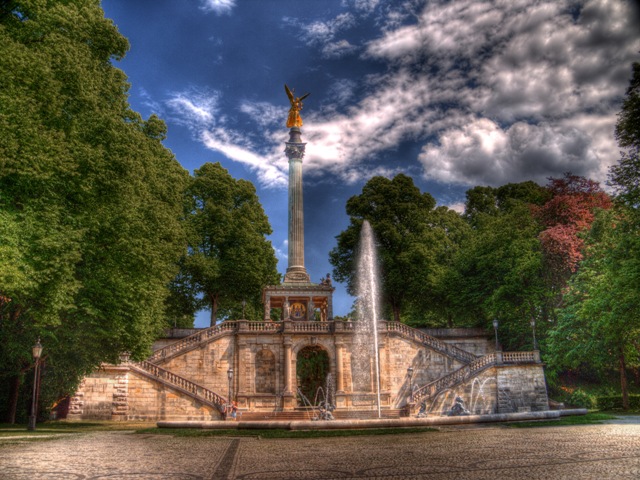
You may have noticed recently that some photographs on Schnitzelbahn don't look quite... "normal". (Check out the photos of the recent Springtime in Munich post.) That's because Frau A and I are trying our hand at HDR Photography. Here's one example (one of my favorites):
HDR stands for High Dynamic Range. To get a more comprehensive overview, check out this article at DPReview.com, one of the best photography sites anywhere. Of course, Wikipedia has good info as well. But I'll try to summarize here...
It's the Catch-22 of sun vs. shadow: On a bright day, we take a photo of something but the sky is ruined. Exhibit A:
What happened? Before taking a shot, the camera meters a scene -- analyzes the amount of light that will be let in. It uses metering to choose the aperture and shutter speed for a shot. In this case the trees came out OK, but even at 1/200th of a second we got too much light from the clouds (they were overexposed, or "blown out").
We can tell the camera to meter on the clouds, either manually or just pointing the center of the frame at the sky... but then the opposite occurs. Exhibit B:
Now the clouds are better, but trees and some brick are way too dark. Why can't the camera capture both the bright highlights and the darker shadows? It's a technical limitation: the sensor (or, previously, the chemical film) simply cannot handle that range of luminance.
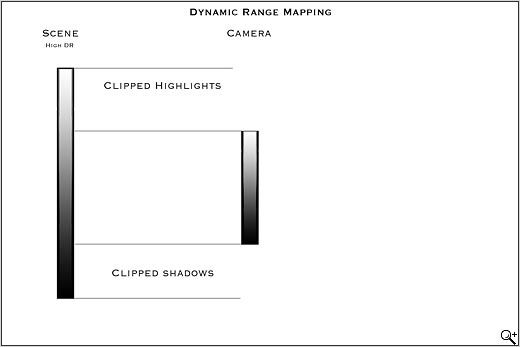
DPReview.com visualizes the problem like this:
One of the first techniques to get around this problem was called exposure blending. Logically, we would want to take multiple photographs with different exposures (often using the bracketing function in today's cameras) and combine them to get the "best of both worlds". DPReview visualizes it this way:
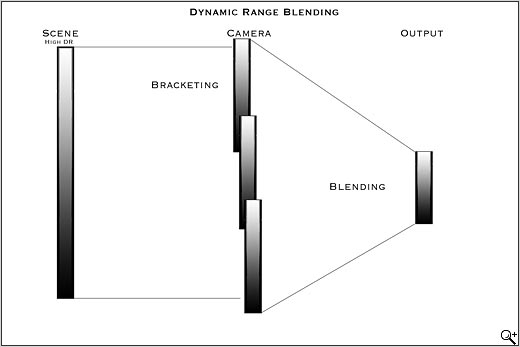
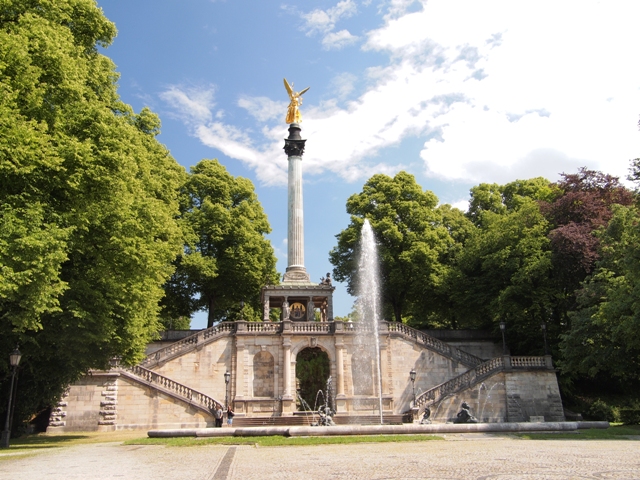
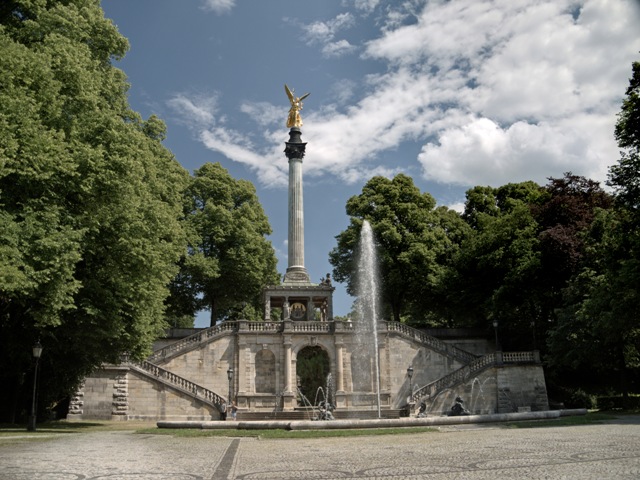
Exposure blending can be done in a number of different software programs like Photoshop, and was possible with chemical film as well. (Of course, moving objects will appear at different places in each exposure, but there are techniques to deal with this "ghosting" too.) This solves the exposure problems we had before, and the output is pretty realistic:
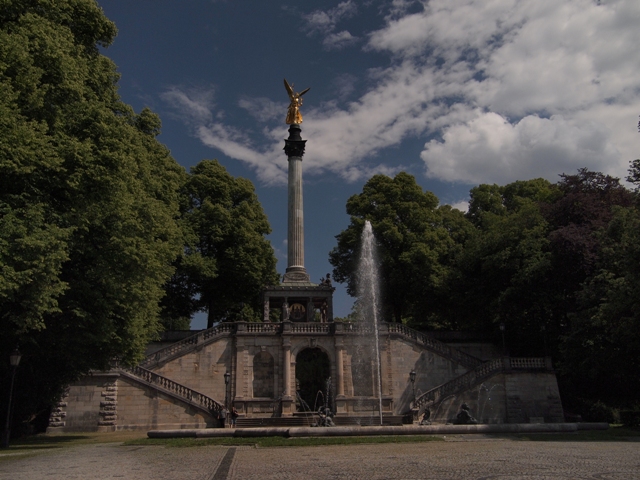
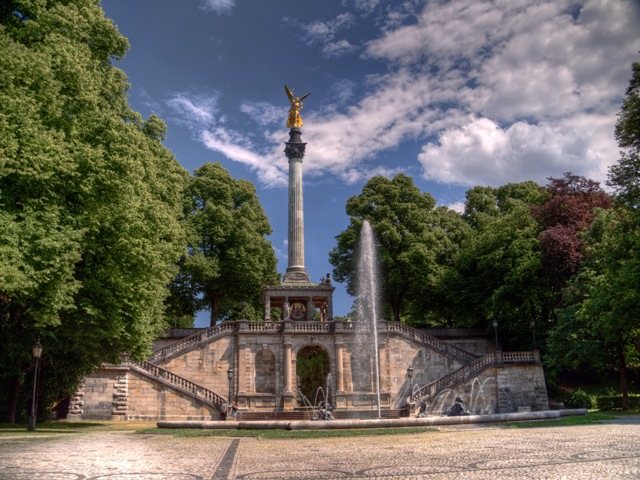
A newer technique is called tone-mapping, which was not possible with chemical film. In this technique, a digital HDR image is created from the bracketed exposures. This file has so much dynamic range that it cannot be displayed correctly on any output device (computer monitors, printed out, etc.)! Software is then used to set the parameters on how this 'super-image' is translated into to something we can display and print. DPReview visualizes it like this:
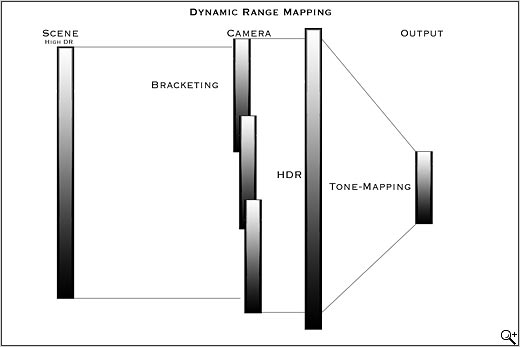
What is unique about tone-mapping (vs. exposure blending) is that it can work "locally". Previously, we could change the global contrast within a photo, but tone mapping can adjust how neighboring pixels relate to each other as well (local contrast). This gives photographers must more flexibility in crafting the final, viewable output from the huge range of luminance and color stored in the HDR file.
Within this flexibility, the results can range from mostly realistic...
... to "painterly" or "grungy" output that extends to the surreal:
You will see a lot of discussion and passionate opinions from photographers on this topic. Some don't like the unrealistic results while others love the artistic, other-worldly potential. One of the most well-known HDR photographers is Trey Ratcliff, whose site Stuck In Customs has stunning photos.
Perhaps you've read my prior post on the Olympus Dramatic Tone "art filter"? How do these compare? The dramatic tone art filter appears to increase contrast and apply an exposure curve -- these are applied globally. Tone mapping can operate locally and be more precise.
Below are two similar images, taken moments apart. The first is with the Olympus Dramatic Tone art filter, the second with 5 bracketed exposures and tonemapped.
I still like the Dramatic art filter a lot, but the trees and water simply have more depth after tonemapping.
The output can be fascinating, but there are some pitfalls of the HDR process. Below, you'll see the original camera JPG and then a bracketed/tonemapped image of the balcony at Nymphenburg Palace in Munich:
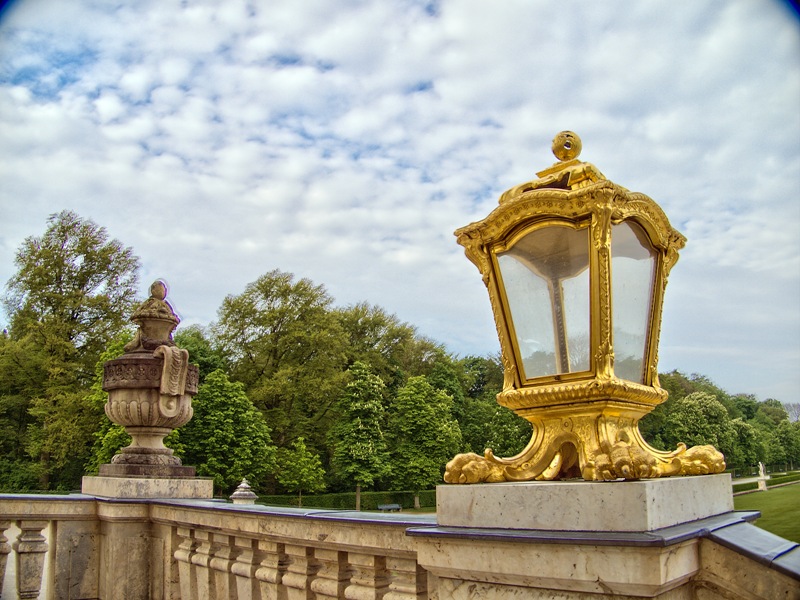
The HDR output has more detail in the stone & sky, and "pops" out at you, but...
- the trees were moving in the wind, and are blurry in the merged exposure (you can imagine what moving people might look like!)
- the merging process also amplified the vignetting of my lens (upper corners are dark)
- the tone-mapping process resulted in a bluish "halo" around the top of the stone "urn" (on the left) - this is a common tonemapping problem along the sky's border
Although it would be nice to have the software do everything automatically, it just doesn't work that way. So we have found also that we spend more time post-processing our photos. There's a lot to learn.
Frau A and I will continue to experiment with HDR photography -- it's been fun so far, and hopefully you like the results too.
 Herr J ... Post a Comment Photography, Art, & Architecture tagged Print Article Email Article Share Article